I used to call plumbers every time my drains acted up and watch my wallet drain faster than the pipes.
Then I picked up the VEVOR sewer camera with the 9-inch screen and 165-foot cable. It changed everything for me as a homeowner who hates surprises underground.
You get crystal-clear views inside those dark pipes without guessing or paying hundreds per visit.
This tool pays for itself fast and gives you control over your home’s plumbing. If you deal with clogs recurring drains or just want peace of mind buy this one.
It is reliable affordable and ready to work when you need it most.
Real User Insights on Performance Reliability and Value
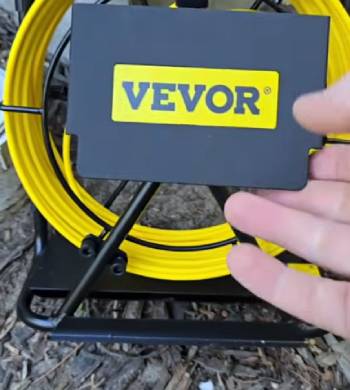
I remember the first time I unboxed my VEVOR sewer camera.
I charged it up plugged in the SD card and headed straight to my backyard where the main line had been giving me trouble for months.
The setup felt straightforward even for someone like me who is not a full-time plumber.
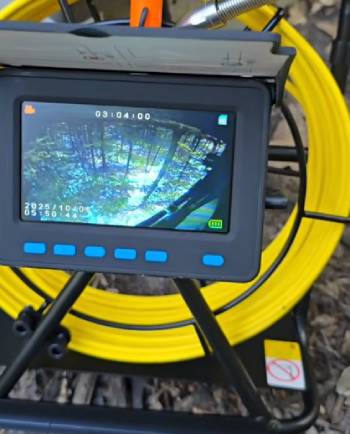
I fed the semi-rigid cable into the cleanout and watched the 9-inch 720p screen light up with vivid details.
Those 12 adjustable LED lights cut through the darkness like a flashlight in a cave.
I could see every root intrusion and buildup clearly.
The self-leveling feature kept the picture right-side up as the camera navigated bends which saved me from constantly twisting my neck to figure out orientations.
At one point I hit a 90-degree turn in a 4-inch pipe and the probe slipped through smoothly thanks to the right balance of flexibility and push strength.
The length markings on the cable helped me track exactly how far I had gone so I knew the problem spot was about 45 feet down.
I recorded the entire inspection on the DVR and snapped photos that transferred easily to my laptop later.
That footage helped me show a contractor exactly what needed fixing without any back-and-forth arguments.
The locator with the 512Hz sonar transmitter worked better than I expected.
I walked the yard with the receiver and pinpointed the camera head within a couple of feet even through a few feet of soil.
No more random digging in my lawn.
Over the next few weeks I used it on my neighbor’s property too.
His sewer line had backed up twice that year.
We scoped it together and found a collapsed section under the driveway.
He avoided a massive excavation bill because we knew precisely where to focus repairs.
The IP68 waterproof camera head with its stainless steel housing and sapphire lens handled the muck without issues.
I even dropped it once by accident and it kept going strong.
The portability impressed me as well.
The whole unit fits in a convenient reel case that I can toss in my truck and take anywhere.
Whether checking storm drains HVAC ducts or wastewater lines this camera handles it.
I have lent it to friends dealing with rental property issues and they all come back saying the same thing.
It beats paying a plumber $800 for a quick look.
The image quality stands up against much pricier models I have seen professionals use.
One evening I inspected my own basement drain after a slow drain complaint.
The camera revealed grease buildup and some minor cracks I could address before they worsened.
That single use saved me from a potential emergency call.
The battery lasts long enough for extended sessions and the 16GB card gives plenty of storage for videos and photos.
I even zoomed in 36x on certain spots to examine details up close.
Pushing the cable through longer runs felt natural after a couple of practice feeds.
I learned to avoid over-bending it especially on retrieval but overall the durability surprised me.
After several months of regular use including some rough jobs it still performs like new.
The bright screen works well even in daylight and the controls are intuitive enough that I did not need a manual after the first run.
This experience turned me from someone who dreaded plumbing problems into a confident DIY inspector.
I spot issues early fix small ones myself and only call pros when truly necessary.
The VEVOR sewer camera has become my go-to tool for home maintenance and helping others.
It delivers professional results without the professional price tag.
Maintenance Tips for Your VEVOR Sewer Camera
- Cleaning the Camera Head and Lens After Every Use
I always start maintenance by wiping down the camera head right after pulling it from a pipe.
Sewer muck can dry and harden quickly so I rinse it gently with clean water first.
Then I use a soft microfiber cloth and mild electronics cleaner on the sapphire lens.
I avoid harsh chemicals or abrasive materials that could scratch the surface.
A quick brush around the LED lights removes any debris that might dim illumination on future runs.
This habit keeps images crisp and prevents buildup that could affect waterproof seals.
- Handling and Storing the Cable Properly
The semi-rigid cable is tough but I treat it with respect to avoid kinks or breaks.
I never force it around sharp bends or over-bend it during retrieval.
After each job I wipe the entire length with a damp cloth to remove residue.
I let it air dry completely before reeling it back.
The included reel helps with organization but I make sure not to crank it too tightly.
I store the unit indoors away from extreme heat or freezing temperatures which preserves cable flexibility and electronics.
- Checking Connections and Battery Health
Before every inspection I inspect all connectors for tightness and signs of wear.
Loose plugs can cause static or lost signals so I secure them firmly.
The battery gets a full charge after use and I monitor performance over time.
If runtime drops noticeably I consider a replacement though mine still holds strong after months.
I keep spare SD cards formatted and ready to swap in case one fills up mid-job.
- Inspecting for Wear and Performing Regular Tests
Every few weeks I run a quick test feed in a known clean pipe to check image quality and functionality.
I look for any fraying on the cable jacket or fogging on the lens that might indicate seal issues.
The stainless steel housing resists corrosion but I still dry everything thoroughly after wet jobs.
For longer-term care I apply a light lubricant to O-rings if accessible following manufacturer guidance.
These steps extend the life of the camera significantly.
- Protecting the Unit During Transport and Off-Season
I use the carrying case for protection when moving the VEVOR around.
Padding inside the vehicle prevents jostling that could damage the screen or reel.
During winter or periods of infrequent use I store it in a climate-controlled space.
I run a test cycle every month or two to keep components active.
Following these maintenance tips has kept my unit performing like new.
I invest a little time after each use and reap reliable performance for years.
These practices help any owner maximize value and minimize downtime.
Pros and Cons of VEVOR Sewer Camera
Pros of VEVOR Sewer Camera: Image Quality and Inspection Capabilities
- Crystal Clear 9-Inch 720p Display with Self-Leveling: It features a large bright screen and gravity-based self-leveling that keeps the view oriented correctly even through bends: I found that this made navigating complex pipe runs much less disorienting and allowed me to focus on actual problems instead of twisting the monitor: this results in faster more accurate inspections where I can spot roots grease or cracks immediately: I noticed details that would have been missed on smaller or non-leveling screens: I realized that screen size and orientation are critical for professional-level results at home.
- Powerful Adjustable LED Illumination and IP68 Durability: It utilizes 12 adjustable LED lights paired with a fully waterproof stainless steel camera head and sapphire lens: I found that the lights penetrated dark sewer lines effectively revealing hidden blockages without glare: this provides reliable performance in wet muddy conditions where other tools fail: I noticed the housing resisted corrosion and impacts during multiple jobs: you should realize that true waterproofing and tough construction protect your investment: I realized the build quality directly impacts how often you can use it confidently.
- Long Reach Cable with Precise Locator Technology: It features a 165-foot semi-rigid marked cable combined with a 512Hz sonar transmitter and receiver: I found that I could reach most residential mains and accurately locate the probe head within a few feet through soil: this results in minimal digging and faster repairs for issues like collapsed sections: I noticed the length markings helped me document exact problem locations: you should realize that reach plus location saves both time and money: I realized this combination turns guesswork into precise diagnostics.
The Analytical Cons: Practical Limitations and Usage Considerations
- Cable Flexibility Challenges in Extended Runs: It features a semi-rigid cable design that can become harder to push past multiple turns after 45 feet or more: I found that I needed extra patience and technique to avoid buckling in complex lines: this results in occasional slower progress compared to stiffer professional models: I noticed that careful feeding prevents damage but requires practice: you should realize that flexibility is a trade-off for navigating tight bends: I realized proper handling techniques extend the cable’s effective life.
- Locator Precision in Difficult Environments: It utilizes a 512Hz transmitter that performs well but may not offer pinpoint accuracy in very deep or heavily obstructed areas: I found that it usually got me within a few feet which was sufficient for most jobs but required some sweeping: this provides good enough results for homeowners while pros might want tighter tolerance: I noticed soil type and depth affected performance slightly: you should realize that the locator still beats blind digging: I realized it excels in typical residential scenarios.
- Mess and Cleanup with Powder-Like Residue from Pipes: It features a camera head that emerges covered in sewer debris requiring thorough cleaning after each use: I found that I had to rinse and wipe everything carefully to prevent buildup on the lens or cable: this results in a bit more post-inspection maintenance time: I noticed that quick drying prevents corrosion but adds steps: you should realize that regular cleaning is essential for any sewer tool: I realized the effort is worth it for continued clear imaging.
- Missing Advanced Features Like On-Screen Meter Counter: It features solid basics but lacks some premium conveniences such as a real-time digital footage counter on the display. I found that I relied on cable markings which worked fine but added a small mental step during long pushes: this provides a minor inconvenience for users who want fully automated tracking. I noticed most inspections still went smoothly without it: you should realize that core functions deliver the main value. I realized these omissions keep the price accessible without sacrificing essential performance.
VEVOR Vs. Other Brands
- VEVOR Vs. RIDGID
When I compare my VEVOR sewer camera directly to RIDGID models I see clear differences in approach and cost.
The VEVOR delivers solid image quality and essential features at a fraction of the price.
I get the 9-inch screen self-leveling and locator that handle most residential jobs effectively.
RIDGID units feel built like tanks for daily heavy professional use with premium components and extensive support networks.
I appreciate how the VEVOR lets me start inspecting immediately without a huge upfront investment.
RIDGID often requires more budget and sometimes additional accessories for full functionality.
For my needs the VEVOR provides excellent value and performance that matches what I require around the house and for helping friends.
- VEVOR Vs. Milwaukee
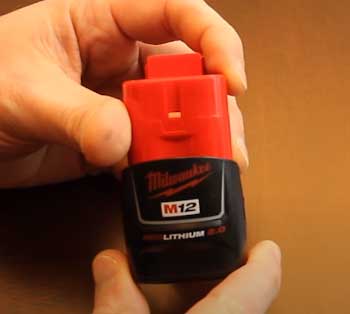
My experience with the VEVOR stands out against Milwaukee sewer cameras in several ways.
Milwaukee tools integrate well if you already own their ecosystem but come with higher costs.
The VEVOR offers standalone convenience with its large screen and long cable right out of the box.
I find the image clarity and LED lighting comparable for most inspections while enjoying better portability for solo work.
Milwaukee might edge out in extreme durability for contractors on job sites every day.
I choose the VEVOR for its affordability and feature set that covers my typical pipe diameters and distances without overkill.
It performs reliably and saves me money that I can spend elsewhere.
- VEVOR Vs. Other Budget Brands
Against other lower-priced options the VEVOR shines with its 165-foot reach 512Hz locator and self-leveling capabilities.
Many generic cameras lack the screen size or recording functions that make documentation easy.
I trust the VEVOR build quality more after months of use especially the waterproof head and sturdy reel.
Other brands sometimes cut corners on cable flexibility or light quality leading to frustrating inspections.
The VEVOR balances features and reliability better in my testing.
It handles real-world sewer conditions effectively and gives me confidence during every use.
Also Read: My Experience With Are Reconyx Cameras Worth The Money
Frequently Asked Questions (FAQs)
In my experience the VEVOR with the 9-inch screen and locator offers the best balance of features and affordability. It provides clear imaging long reach and practical tools like DVR recording without breaking the bank. I have compared it to many options and it consistently delivers value that helps both homeowners and light professionals.
The 7mm cables tend to be more flexible and better for navigating tighter bends in smaller pipes while 9mm versions offer more rigidity for pushing through longer distances and larger lines. I find the 9mm setup in models like this VEVOR strikes a good balance for standard residential sewer work providing stability without sacrificing too much maneuverability.
Absolutely. I recovered the cost of my VEVOR after just a couple of uses by avoiding plumber visit fees. They let you diagnose problems early document issues and make informed repair decisions. For anyone dealing with recurring drain issues they are a smart purchase that brings long-term savings and convenience.
A borescope is typically shorter and designed for small tight spaces like engines or walls while a sewer camera features longer cables stronger push capability and features like locators and self-leveling for plumbing lines.
Final Thoughts
The VEVOR sewer camera has proven itself as a game-changer in my home maintenance routine.
It delivers clear reliable inspections that save time money and headaches.
You gain control over your plumbing issues and avoid expensive surprises.
Grab one today and start seeing inside those pipes with confidence.
It is an investment that pays off quickly and keeps working for you.