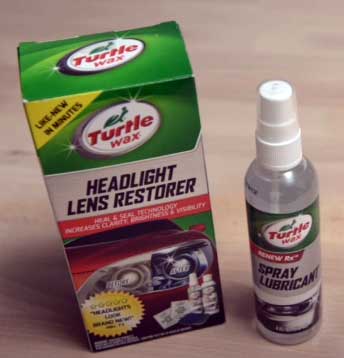
Hey, you! Yes, you with the foggy headlights that make night driving feel like a scene from a horror movie. If you’re tired of squinting through the haze and want a budget-friendly fix, let me tell you why you should grab the Turtle Wax Headlight Lens Restorer Kit right now.
I’ve been there—old car, yellowed lights, and a sinking feeling that replacements would cost a fortune. This little kit promises to zap that oxidation and bring back clarity without breaking the bank or requiring fancy tools.
Trust me, it’s worth a shot—your headlights (and your sanity) will thank you!
My Experience With Turtle Wax Headlight Lens Restorer
Picture this: It’s a gloomy Saturday afternoon, and I’m staring at my 2010 Honda CR-V, its headlights looking like they’ve been through a sandstorm and a decade of neglect.
They were cloudy, yellowed, and honestly, a little embarrassing.
I could barely see the road at night, and I wasn’t about to shell out hundreds for new assemblies.
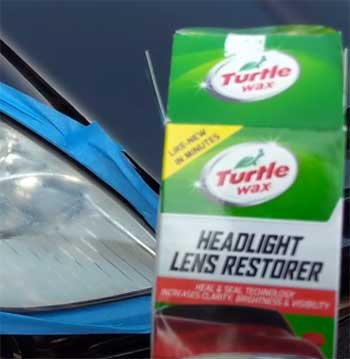
So, I snagged the Turtle Wax Headlight Lens Restorer Kit from a local auto store, figuring I’d give it a whirl.
The box screamed “#1 Selling Headlight Kit!” and promised dramatic results without a power drill.
I’m no mechanic, so that sounded perfect.
I cracked open the kit—simple stuff: a spray lubricant, a lens clarifying compound, some sanding pads, and a couple of wipes for sealing the deal. The instructions were straightforward, which I appreciated because I’m not one for complicated manuals.
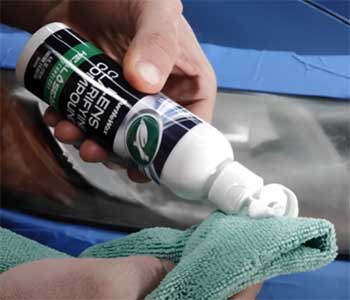
I started by cleaning the lenses with the clarifying compound, rubbing it in with a microfiber cloth. It took some elbow grease—my arms were complaining after a few minutes—but I could see the yellow gunk starting to lift.
Next, I moved to the sanding pads, working through the grits from coarse to fine, spritzing the lubricant to keep things smooth. It felt satisfying, like sanding down an old piece of furniture, watching the haze slowly disappear.
The real magic happened with the wipes. After polishing the lenses to a decent shine, I wiped on the Lens Base Coat Wipe, and bam—those headlights went from “meh” to “whoa.”
They weren’t just clearer; they looked almost new, like I’d rolled back the clock. I stood back, turned on the lights, and couldn’t believe the difference. Night driving went from a guessing game to a clear view of the road ahead. Sure, it took about an hour total, including taping off the edges to protect the paint, but for less than 20 bucks, I was sold.
The only hiccup?
I wished I had extra wipes for a second go-round later. Still, my first spin with this kit left me grinning—and seeing—better than I had in years.
Pros of Turtle Wax Headlight Lens Restorer
- Affordable and Accessible: Let’s talk money first because, honestly, who doesn’t love a good deal? This kit is dirt cheap—usually under $20—and you can find it at any auto store or big retailer. Compared to replacing headlights, which can run you hundreds, or even other kits that flirt with higher price tags, Turtle Wax keeps it real. I didn’t have to drain my savings to see results, and that’s a huge win in my book.
- No Power Tools Needed: I’m not handy with a drill, and I bet a lot of you aren’t either. The beauty of this kit is that it’s all manual—sanding pads, a cloth, and your own effort. No cords, no batteries, no stress. I got stellar results just using my hands, and it felt empowering to fix something without needing a garage full of gadgets. It’s perfect for beginners or anyone who’d rather keep things simple.
- Impressive Clarity Boost: The transformation blew me away. My headlights went from a dull, foggy mess to nearly crystal clear. That Lens Base Coat Wipe? It’s like a secret weapon—suddenly, the light cut through the night like it was supposed to. I’d say it restored about 95% of the original brightness, and for a car pushing 15 years old, that’s incredible. Safer driving and a sharper look? Yes, please!
- Easy-to-Follow Process: I’m no expert, but the instructions made me feel like one. Clean, sand, polish, seal—done. It’s laid out so clearly that even if you’ve never touched a car beyond filling the gas tank, you can handle this. I spent less than an hour, including prep, and didn’t feel lost once. The kit’s design keeps it foolproof, which I appreciated as someone who’s more likely to bake a cake than fix a car.
- Long-Lasting First Impression: Right after I finished, those headlights stayed pristine for days. I drove through rain, dust, and even a buggy evening, and they held up. The sealant wipe seems to do its job—at least initially—keeping that freshly restored look intact. I can’t speak for months down the road yet, but the immediate durability gave me confidence I hadn’t wasted my time.
Cons of Turtle Wax Headlight Lens Restorer
- Limited Sealing Wipes: Here’s where I hit a snag: the kit only comes with one set of sealing wipes—one base coat, one sealant. The bottles of lubricant and compound have enough juice for multiple uses, but those wipes are a one-and-done deal. I wanted to stash some for later touch-ups, but no dice. I hunted online for extras, and it’s not clear if Turtle Wax sells them separately. That’s frustrating when the wipes are what take the results from good to great.
- Elbow Grease Required: Don’t get me wrong—the results are worth it—but this isn’t a five-minute fix. My arms got a workout sanding through those grits, especially on my stubborn, oxidized lenses. It took two or three rounds to really clear the gunk, and by the end, I was huffing a bit. If you’re expecting a quick wipe-and-go, this might test your patience.
- Residue Can Be Tricky: After applying the clarifying compound, I had a heck of a time getting all the creamy residue off. It clung to the lenses like a bad ex, and I ended up grabbing some glass cleaner to finish the job. The instructions don’t warn you about that, so it caught me off guard. It’s not a dealbreaker, but it added an extra step I wasn’t thrilled about.
- Durability Questions: I’m thrilled with how my headlights look now, but I’ve got this nagging worry: how long will it last? Some folks say the clarity fades after a few months, especially in harsh climates. I live where the sun’s brutal and the roads are gritty, so I’m crossing my fingers the sealant holds up. It’s too soon for me to judge, but it’s something you might want to keep an eye on.
Tips For Turtle Wax Headlight Lens Restorer
- Regular Cleaning Keeps It Fresh: Once you’ve restored your headlights, don’t let them slide back into chaos. I’ve started wiping mine down every couple of weeks with a damp microfiber cloth—just a quick once-over to knock off dirt and bugs. It’s simple, takes five minutes, and keeps that clarity popping. Think of it like brushing your teeth; a little routine goes a long way.
- Wax On, Oxidation Off: Here’s a trick I picked up: slap some car wax on those lenses after restoration. The kit’s sealant is solid, but adding a layer of wax every month or so—like when you’re waxing the rest of your ride—helps fend off UV rays and grime. I use a basic paste wax, rub it in, and buff it off. It’s like sunscreen for your headlights, and it’s kept mine looking sharp so far.
- Tape It Up for Touch-Ups: If you need to redo a spot—say, a corner gets hazy again—tape off the area with painter’s tape before sanding. I learned this the hard way when I accidentally scuffed my bumper the first time. A little tape keeps you precise and protects the paint. It’s a small hassle for a big payoff, trust me.
- Store Leftovers Smart: Since the kit’s got extra compound and lubricant, don’t toss it in a dusty garage corner. I stashed mine in a sealed plastic bag in a cool, dry spot. That way, if I need a quick touch-up (and can find more wipes), it’s ready to go. No sense letting good product go to waste, right?
- Watch the Weather: I’ve noticed my headlights take a beating faster in summer sun or winter salt. After restoration, try parking in the shade or a garage when you can—it’s not always doable, but it helps. If you’re stuck outside, check them more often and hit them with that wax. Prevention’s easier than another full scrub-down.
Comparison of Turtle Wax Headlight Lens Restorer With Other Brands
Let me walk you through how Turtle Wax Headlight Lens Restorer stacks up against some big players in the game—Cerakote, Sylvania, and Meguiar’s. I’ve tinkered with my fair share of car fixes, and while Turtle Wax won me over, these others have their own flair.
Here’s how they match up, head-to-head, based on my experience and what I’ve gathered from fellow DIYers.
- Turtle Wax Vs. Cerakote Headlight Restoration Kit
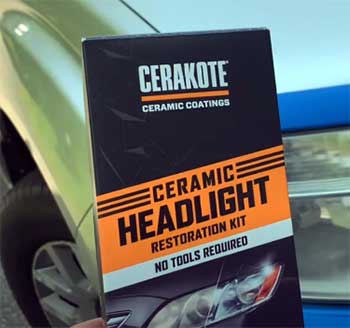
When I pitted Turtle Wax against Cerakote headlight restoration kit, the vibe was night and day.
Turtle Wax is my hands-on buddy—no power tools, just sanding pads and elbow grease, all for under 20 bucks.
It gave my foggy lenses a solid 95% glow-up, especially with that killer Lens Base Coat Wipe.
Cerakote, though, rolls in with a ceramic coating angle—less scrubbing, more wiping on a high-tech sealant.
It’s pricier, closer to $25-$30, and promises longer-lasting protection against UV rays.
I stuck with Turtle Wax for its simplicity and cost, but if you’re after a low-effort job with fancy durability claims, Cerakote might tempt you.
Still, I’d miss Turtle Wax’s satisfying grit-by-grit progress.
- Turtle Wax Vs. Sylvania Headlight Restoration Kit
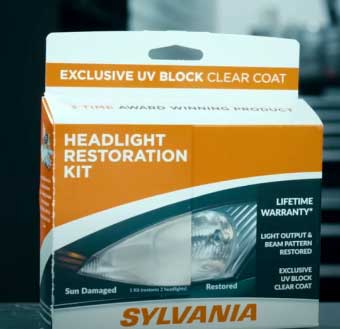
Next up, Sylvania headlight restoration kit—it’s got a rep as the premium pick, and I get why.
Turtle Wax kept my process manual and budget-friendly, with clear results in about an hour.
Sylvania, though, ups the ante with a more complex kit—sanding, polishing, and a UV-blocking clear coat that’s said to outlast most.
It’s about $25 or more, and some swear it’s tougher on deep haze than Turtle Wax.
I didn’t need Sylvania’s extra steps for my moderately cloudy lights, and I loved Turtle Wax’s no-drill ease.
But if your lenses are a wreck or you want that “set it and forget it” vibe, Sylvania could edge out my trusty Turtle Wax in longevity.
- Turtle Wax Vs. Meguiar’s Headlight Restoration Kit

Finally, Meguiar’s—it’s a different beast from Turtle Wax, and I mulled it over before picking.
Turtle Wax gave me a full kit: sanding pads, compound, wipes, the works, all for a steal.
Meguiar’s leans simpler—its kit (around $25) includes a polish and pad, but you can grab their PlastX separately for lighter jobs.
It’s great for a quick buff, but my yellowed lenses needed Turtle Wax’s multi-step muscle to really shine.
Meguiar’s might save time if your headlights aren’t too far gone, and it’s gentler on plastic.
I went with Turtle Wax because it tackled my oxidation head-on, but Meguiar’s could be your go-to for a speedy touch-up with less sweat.
Frequently Asked Questions (FAQ)
You bet it does! I saw it with my own eyes—my crusty old headlights went from murky to nearly new. It’s not just hype; the sanding and wipes really strip away that oxidation. It’s not perfect for every lens, and you’ve got to put in some sweat, but for most cloudy headlights, it’s a solid yes from me.
Tough call—I’d say it depends on what you need. Turtle Wax is tops for affordability and ease, which is why I picked it. But pros and reviews often crown Sylvania for its lasting clarity across all lenses, or 3M for heavy-duty jobs with a drill. For my money and effort, Turtle Wax hit the sweet spot.
The sealant wipe needs about 24 hours to fully set, according to the box. I noticed mine looked awesome right away, but I gave it a full day before driving in rain, just to be safe. It’s quick to apply, but that curing time locks in the shine.
Absolutely—don’t let skeptics fool you. I was on the fence too, but after using Turtle Wax, my night vision’s better, and my car looks less ancient. They’re not miracles—super scratched lenses might still need replacing—but for yellowing and haze, restorers like this are legit game-changers.
Final Thoughts
So, there you have it—my journey with the Turtle Wax Headlight Lens Restorer Kit, and why I think you should snag one too. It’s affordable, easy, and delivers a punch of clarity that’ll make your night drives safer and your car prouder.
I’ve laid out the highs, the lows, and the tricks to keep those lenses gleaming. Don’t let foggy headlights dim your ride—grab this kit, roll up your sleeves, and see the difference for yourself. You won’t regret it!