Deciding between POR-15 and Rust Bullet is a pivotal moment for any restoration project I undertake.
I have spent many long weekends under rusted car frames, testing these coatings to see which one truly survives the road.
In this article, I will analyze the chemistry, application hurdles, and long-term durability of both products to help you choose the right armor for your metal.
You should realize that while both aim to kill rust, their philosophies on surface preparation and UV stability are completely different, and picking the wrong one could mean starting over in a year.
Comparison Overview: POR-15 Vs. Rust Bullet
| Feature | POR-15 Rust Preventive | Rust Bullet Standard |
| Technology | Moisture-Cured Urethane | Aluminum-Pigmented Urethane |
| Surface Prep | High (Degrease, Etch, Dry) | Low (Wire brush loose flakes only) |
| UV Resistance | Poor (Must be topcoated) | Excellent (UV Stable) |
| Steps Needed | 3-Step Process | 2-Step Process (Same product) |
| Bonding Type | Mechanical (Needs “tooth”) | Chemical & Mechanical |
| Standard Color | High-Gloss Black | Metallic Silver/Grey |
| Drying Time | 2-5 Hours | 2-4 Hours |
| Shelf Life | Low (Once opened) | Moderate |
My Personal Journey Through the Rust War
I remember the first time I faced a floor pan that looked like Swiss cheese.
I am a person who believes in the “over-engineered” approach, so I naturally started my journey with POR-15.
I noticed immediately that this product is not just a paint; it is a rigid chemical system that demands total obedience to its instructions.
I found that if I didn’t spend three hours degreasing and etching the metal with their proprietary solutions, the coating would simply peel off like a sunburned skin.
I eventually moved on to a truck chassis where the logistics of rinsing acid etcher off a 20-foot frame were just not feasible.
I eventually tried Rust Bullet, and I noticed that the experience was far more forgiving for a “real world” garage setting.
I found that I could skip the complicated chemical washes and go straight from a wire wheel to the paint brush.
I am someone who appreciates a product that works with me rather than against me, and I noticed that Rust Bullet’s ability to stick to almost anything—rusted or clean—saved me an entire day of labor.
I eventually found myself checking on a project that had been sitting in the sun for several months.
I noticed that the POR-15 had turned a sad, chalky grey and was starting to look brittle.
On the other hand, I realized that the Rust Bullet looked exactly the same as the day I applied it.
I found that the biggest difference for me personally was the “armor” factor.
I noticed that while POR-15 is incredibly hard and ceramic-like, Rust Bullet feels more like a physical plate of metal has been fused to the surface.
I realized that if I am doing a show-car restoration where I can sandblast every square inch, POR-15 is a fantastic choice for that deep black finish.
I found, however, that for my daily drivers and work trucks, Rust Bullet is the analytical winner because of its one-product simplicity.
I finished my testing realizing that the “best” product is the one that fits your specific environment and your willingness to scrub metal.
I eventually learned that rust never sleeps, but these two coatings are the closest I have ever come to putting it in a permanent coma.
Maintenance Tips for Your Metal Armor
- Degrease with Water-Soluble Solvents: You should realize that any oil residue is the enemy of urethane. Using a heavy-duty degreaser and rinsing with hot water is a vital maintenance tip for prep, which I found ensures the paint actually bites into the metal.
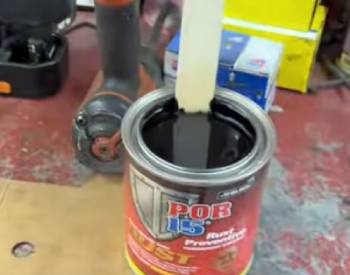
- Never Paint Out of the Main Can: You should notice that dipping a brush into the can introduces moisture and dirt. Pouring what you need into a separate cup is a key maintenance tip for longevity, which results in the rest of your gallon staying fresh in the garage.
- Seal the Rim with Plastic Wrap: You should realize that these paints are designed to be permanent adhesives. Placing a piece of heavy plastic over the opening before hammering the lid on is a smart maintenance tip for storage, which I found prevents the “welded lid” syndrome.
- Apply Two Thin Coats Instead of One Thick One: You should notice that “glopping” the paint on can trap gases and lead to a soft, gummy finish. Waiting for the proper “tacky” window between layers is an essential maintenance tip for curing, which provides the strongest final shell.
- Check for Pinhole Breaches: You should realize that a single missed spot can allow rust to start a colony under the paint. Inspecting your work with a bright light after the first coat is a great maintenance tip for efficacy, which I found ensures 100% coverage.
- Rinse Off Road Salt Every Spring: You should notice that road salt is the ultimate test for any coating. Using a high-pressure undercarriage wash after winter is a crucial maintenance tip for your vehicle, which results in the coating lasting twice as long.
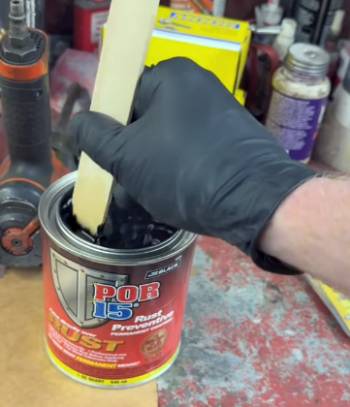
Pros and Cons of POR-15: The ceramic-hard shield
Pros of POR-15: The ceramic-hard shield
- Rock-Hard Surface Integrity: It features a moisture-cured resin that dries to a finish almost as hard as glass: I found that this creates a structural “shell” over the metal: this results in a barrier that is nearly impossible to scratch with a wrench: I noticed that it effectively reinforces metal that has become thin from oxidation.
- Self-Leveling Aesthetic Excellence: It utilizes a thin consistency that flows into every microscopic pit and weld: I found that even when applied with a cheap brush, the finish looks like it was professionally sprayed: this provides a deep, liquid-black look that is perfect for suspension components: I noticed that brush marks vanish within minutes of application.
- Absolute Chemical Resistance: It features a non-porous surface that is completely impervious to battery acid, gasoline, and brake fluid: I found this essential for engine bay components: this results in a finish that won’t “melt” or soften when a mechanical leak occurs: I noticed that even harsh industrial degreasers won’t dull the gloss.
- Penetrating Capillary Action: It utilizes a watery viscosity that wicks into tight seams and overlaps: I found that it seals the areas where rust usually hides: this provides a total encapsulation of the metal’s pores: I noticed it literally “soaks” into the rust to lock out all oxygen.
- Decades of Proven Results: It features a long-standing reputation as the industry standard for automotive restoration: I found that most veteran builders trust it for high-value projects: this provides a high level of market confidence: I noticed that the technical support and community knowledge base are vast.
Cons of POR-15: The demands of a perfectionist
- Obsessive Surface Preparation: because the coating relies on a mechanical bond to an etched surface: I found that any trace of oil or smooth metal will cause the paint to fail: this results in a high failure rate for users who try to “short-cut” the cleaning process: I noticed that it will peel off in large sheets if the prep isn’t 100% perfect.
- Zero UV Resistance: because the aromatic urethanes in the formula break down under sunlight: I found that it turns into a chalky grey mess if exposed to the sun for even a week: this provides the extra cost and labor of buying a secondary topcoat: I noticed it is strictly an under-car or “shaded area” product.
- Dangerous Skin Bonding: because it reacts with the moisture in your skin as effectively as it reacts with metal: I found that if it gets on your hands, it stays there for two weeks: this results in a messy and sometimes embarrassing cleanup process: I noticed that no solvent can remove it once it starts to “flash” on your skin.
- Lid Welding and Storage Issues: because the humidity in the air will trigger the curing process inside the can: I found that the lid will seal itself shut permanently if any paint is left on the rim: this results in many people having to cut their cans open to get the product out: I noticed that once opened, the shelf life is very short.
- High Overall System Cost: because you are required to buy the “Cleaner Degreaser” and “Metal Prep” to ensure it works: I found that a small project can become expensive very quickly: this provides a barrier for budget-conscious DIYers: I noticed that the “kit” price is often double the cost of a competitor’s single can.
Pros and Cons of Rust Bullet: The high-tech armor plate

Pros of Rust Bullet: The high-tech armor plate
- Two-Step Simplicity: It features a “Direct to Metal” formula that doesn’t require separate acids or etchers: I found that I saved hours of labor by just wire-brushing and painting: this results in a much faster project completion time: I noticed that it adheres to both rusted and clean metal with equal tenacity.
- Built-in UV Stability: It utilizes a formula that is naturally resistant to sunlight: I found that I didn’t need to apply a topcoat to my bumpers or exterior frames: this provides a huge saving in material costs and time: I noticed the metallic finish looks professional and stays consistent for years.
- Aluminum-Pigmented Strength: It features microscopic aluminum flakes that overlap to form a physical armor: I found that this adds a layer of impact resistance that standard paints lack: this results in a coating that “flexes” with the metal: I noticed it handles the vibration of heavy frames without cracking.
- Forgiving Chemistry: It utilizes a bond that is less sensitive to minor surface contaminants: I found that it still worked even when the metal wasn’t “laboratory clean”: this provides a more reliable result for driveway mechanics: I noticed a much lower peeling rate compared to other urethanes.
- One-Product Inventory: It features a system where the first coat is the primer and the second coat is the finish: I found it much easier to manage my supplies: this results in less wasted product and fewer cans taking up space: I noticed that I only ever had to buy one type of liquid.
Cons of Rust Bullet: The trade-offs for power
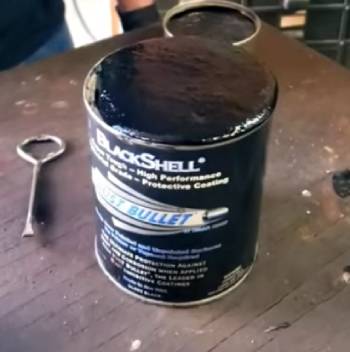
- Aesthetic Limitations: because the standard formula only comes in a metallic silver/grey color: I found that if I wanted a black frame, I still had to buy their separate “BlackShell” product: this results in a limitation for those wanting a factory-original look: I noticed the silver is very bright and shows every bit of road dirt.
- Slower Initial “Flash” Time: because the formula is designed to penetrate deeply before it hardens: I found that I had to wait longer between coats compared to the fast-drying POR-15: this provides a bit of a bottleneck for those trying to finish a project in one afternoon: I noticed it remains “soft” to the touch for several hours.
- Thin Consistency Splatter: because it is quite fluid to ensure it reaches the bottom of rust pits: I found that it tended to run on vertical surfaces if I applied it too heavy: this provides a need for more “back-brushing” to keep the finish even: I noticed it can be quite messy to spray without a very fine nozzle.
- Premium Price Point: because the technology is proprietary and high-grade: I found that it is one of the more expensive single-can products on the market: this results in a high upfront cost: I noticed that while you save on prep chemicals, the paint itself is a major investment.
- Air-Bubble Sensitivity: because of the way the aluminum flakes must be stirred: I found that I had to stir it constantly to keep the pigment from settling: this provides a risk of trapping air bubbles if you stir too aggressively: I noticed that if you don’t stir enough, the protection is inconsistent.
Comparison with Others
- POR-15 Vs. Chassis Saver
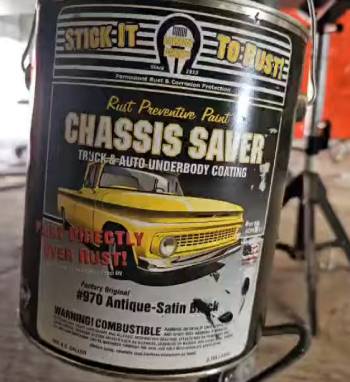
I found that Chassis Saver is very similar to POR-15 but is often much thicker and more industrial.
You should realize that Chassis Saver is designed for utility trucks and is very “forgiving” of rust.
I noticed that POR-15 has a much nicer finish for show cars, while Chassis Saver looks like a heavy-duty work coating.
I believe that Chassis Saver is the better choice for you if you have a work truck, while POR-15 is for the hobbyist.
- Rust Bullet Vs. Corroseal
I noticed that Corroseal is a water-based converter that turns rust into a black primer.
I found, however, that Corroseal is not a “final” coating and must be painted over.
You should realize that Rust Bullet is a structural armor, whereas Corroseal is just a chemical treatment.
I believe that Rust Bullet is the analytical winner for you if you want a one-product solution that actually protects the metal physically.
Also Read: Comparison Of Por-15 Vs. Eastwood
Frequently Asked Questions (FAQs)
For those who want less prep, Rust Bullet or Chassis Saver often “work better” because they bond more easily to imperfectly cleaned surfaces.
It is extremely durable; as a moisture-cured urethane, it can resist rock chips and salt for over a decade if applied in two heavy coats.
Yes, it is excellent for chassis work due to its hardness and chemical resistance, provided it is properly topcoated to prevent UV damage.
It typically takes 3 to 6 hours to be tack-free and 24 hours to fully cure, though high humidity will speed this up significantly.
Final Thoughts
You should buy POR-15 if you are a “perfectionist” restorer who is willing to do the grueling prep work required for an industrial-strength, ceramic-hard finish.
I have found that for most of you, Rust Bullet is the better analytical choice for daily drivers because it offers a one-step, UV-resistant shield that is much harder to “mess up” during application.
I believe that as long as you respect the moisture-curing nature of these chemicals and seal your cans properly, you will keep your project on the road for decades.