Picture this: you’re cruising down the highway, tunes blaring, when—THWAP!—a rogue pebble smacks your windshield, leaving a nasty chip. Don’t let that small ding turn into a wallet-draining crack.
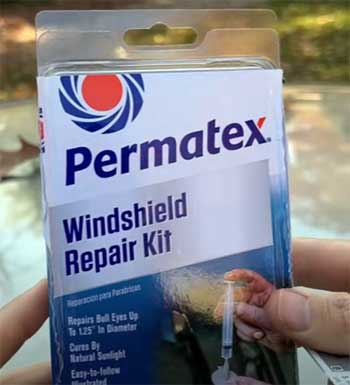
The Permatex Windshield Repair Kit is your DIY savior, transforming a potential headache into a quick fix. For less than twenty bucks, this all-in-one kit promises professional-quality repairs without the hassle of mixing or pro skills.
Trust me, you’ll want this in your glovebox before disaster strikes. Let’s walk through my experience and why this kit is a game-changer for your ride.
My Run-In With A Rogue Rock and the Permatex Fix
I’ll never forget that sinking feeling on the interstate, heading to a car show with my shiny ride.
A loud THWAP echoed through the cabin, and my heart sank as I spotted the damage—a bullseye chip, smaller than a dime but glaringly obvious from the driver’s seat.
Panicked, I texted my car guy, but he had no quick fixes, leaving me to fend for myself.
Replacing the windshield? That meant deductibles, potential leaks, and maybe a botched lane-keeping camera.
No thanks. I remembered windshield repair kits from years ago, though my past tries were meh at best.
Still, I figured, what’s the worst that could happen?
Enter the Permatex Windshield Repair Kit, snagged online for a steal compared to competitors.
It arrived fast, and I carved out an afternoon in my garage to tackle the repair.
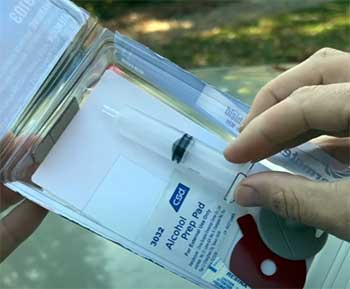
The kit’s got everything: a syringe, plunger, resin, adhesive disc, pedestal, curing strip, pushpin, razor blade, alcohol towelette, and a photo-packed instruction sheet. First, I used the pushpin to clear loose glass from the chip.
Worried about debris lingering, I grabbed my cordless vacuum to suck it all out—pro tip: do this for a cleaner repair. The instructions, while detailed, felt a bit dense, but I muddled through, setting up the adhesive disc and pedestal in the shade as directed.
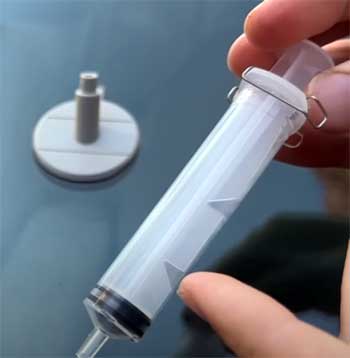
The syringe and plunger system was the star. I squeezed resin into the pedestal, locked the plunger, and let it work its magic for 20 minutes. A paper towel below caught drips—another pro tip after resin splattered when I removed the pedestal too fast.
After applying a final resin drop and curing strip, I parked my car in partial sunlight for an hour (cloudy days need longer). Peeling off the strip revealed a tiny dot where the chip once screamed for attention.
A quick wipe with denatured alcohol cleaned up stray resin, and I was stunned. My windshield looked nearly new, and that dot? Barely noticeable unless you squint.
This wasn’t just a repair; it was a confidence boost. I’d saved hundreds and dodged the replacement hassle. But how does this kit stack up, and what’s the real scoop on its strengths and quirks?
Let’s break it down.
Pros of The Permatex Windshield Repair Kit
- Easy-Peasy Application
You don’t need to be a gearhead to use this kit.
The syringe and plunger setup is dummy-proof, guiding resin into the chip with minimal mess.
The spring-lock feature means no mixing—just squeeze and go.
I fumbled a bit with the adhesive disc, but the photo instructions walked me through it.
In under an hour, I went from stressed to stoked, and you can too, even if your DIY skills are limited to changing a lightbulb.
- Wallet-Friendly Fix
At roughly $15, this kit is a steal compared to professional repairs, which can run $50-$100, or full windshield replacements costing hundreds. I saved my deductible and avoided insurance headaches.
For the price of a couple of takeout coffees, you get a permanent, airtight seal that keeps your windshield intact. It’s a no-brainer for budget-conscious drivers like me who hate overpaying for fixes.
- Professional-Grade Results
The resin cures under sunlight, blending seamlessly with your windshield. My bullseye chip shrank to a near-invisible dot, and months later, it hasn’t spread.
Permatex uses acrylic resin, known for its UV resistance and tensile strength, mimicking pro repairs. You’ll impress yourself with results that look like a glass shop’s handiwork, minus the hefty bill.
- All-Inclusive Convenience
Everything you need is in the box: syringe, plunger, resin, adhesive disc, pedestal, curing strip, pushpin, razor blade, alcohol towelette, and instructions.
No running to the store mid-repair. I appreciated the thoughtfulness, especially the towelette for prepping the glass. It’s like a meal kit for your windshield—just follow the steps, and you’re golden.
- Versatile for Small Damage
This kit handles bullseyes, star cracks, and chips up to 1.25 inches, covering most minor windshield woes. My bullseye was a textbook case, but friends have used it on star cracks with similar success.
It’s not for long cracks, but for common dings from gravel or debris, it’s your go-to. You’ll feel prepared for whatever the road throws at your glass.
Cons of The Permatex Windshield Repair Kit
- Tricky Instructions: The instruction sheet is packed with info, but it’s not the friendliest read. I found myself re-reading steps to avoid screwing up, and the small text didn’t help. A checklist format or clearer layout would make it less daunting. You’ll need patience to decode it, especially if you’re new to DIY repairs. Watch a YouTube video beforehand—it helped me visualize the process.
- One-and-Done Limitation: This kit is designed for a single repair. If you’ve got multiple chips or mess up the first try, you’re out of luck unless you buy another. I got lucky with my one chip, but if your windshield is a rock magnet, you might need a multi-use kit. It’s a bummer for those needing more than one fix without restocking.
- Resin Splatter Risk: Removing the pedestal was my least favorite part. I pulled too quickly, and resin splattered, nearly hitting my wiper blade. The instructions warn about drips, but a heads-up on gentle removal would’ve saved me a mini heart attack. You’ll want to cover the area with a paper towel and move slowly to avoid a mess.
- Bullseye-Only Focus: The kit’s marketed for bullseyes, though it can handle star cracks and chips up to 1.25 inches. I was paranoid my chip wasn’t a “true” bullseye, and the product page could clarify this better. If you’ve got a long crack or complex damage, this won’t cut it. You’ll need to confirm your chip type before diving in.
Maintenance Tips For Your Repaired Windshield
- Keep It Clean: Post-repair, your windshield needs TLC to stay pristine. I wash mine weekly with a gentle glass cleaner and microfiber cloth to avoid scratching the repaired spot. Avoid abrasive sponges or harsh chemicals—they can weaken the resin. A clean windshield also helps you spot new chips early, so you can act fast before they spread.
- Park Smart: Temperature swings are a chip’s worst enemy. I park in my garage or shaded areas to shield my windshield from extreme heat or cold, which can stress the glass and resin. If you’re stuck in open parking, consider a windshield sunshade to keep things cool. It’s a small habit that extends your repair’s life.
- Inspect Regularly: I check my windshield monthly for new dings or signs the repair’s failing, like spreading cracks. Catching issues early lets you reapply the kit or call a pro before it’s replacement time. Shine a flashlight at different angles to spot sneaky damage. You’ll feel like a detective, but it’s worth the peace of mind.
- Avoid High-Pressure Washes: Car washes with high-pressure jets can stress the repaired area, potentially loosening the resin. I stick to hand washing or touchless washes to play it safe. If you love drive-through washes, warn the attendant about your repair. It’s a simple way to protect your fix and keep your windshield looking sharp.
- Stock a Spare Kit: After my repair, I bought a second Permatex kit to keep in my trunk. Chips don’t announce themselves, and having a kit handy means you can fix damage ASAP. Store it in a cool, dry place to preserve the resin. You’ll thank yourself when the next pebble strikes.
Comparison With Other Windshield Repair Kits
- Rain-X Windshield Repair Kit
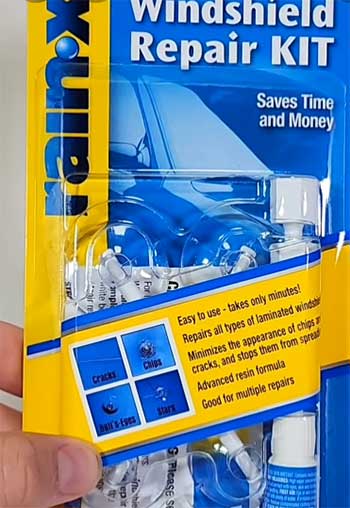
Rain-X is a heavy hitter in the windshield repair game, and its kit is a close rival to Permatex.
Like Permatex, it uses a resin-based system with a syringe and plunger, but it’s marketed for both chips and cracks up to 12 inches, slightly broader than Permatex’s 1.25-inch limit.
I tried Rain-X on a friend’s car, and the applicator felt a bit flimsier, with a smaller plunger that was harder to grip.
The resin cured well, but the instructions were less visual, leaving me second-guessing steps.
Rain-X shines for longer cracks, but for bullseyes, Permatex’s spring-lock system and photo guides gave me more confidence.
Price-wise, they’re neck-and-neck, so it’s about ease versus versatility.
- Blue Star Windshield Repair Kit
Blue Star’s kit is the budget champ, often under $10, but you get what you pay for. It skips the tripod-style applicator for a single-use cup and injector, which felt cheap and wobbly when I tested it on a spare windshield.
The resin worked decently for tiny chips, but the lack of a suction system meant air bubbles lingered, making the repair less polished than Permatex’s. Blue Star’s instructions are bare-bones, and there’s no spring-lock finesse.
If you’re pinching pennies and have a minor ding, it’s fine, but Permatex’s all-in-one kit and pro-grade results outshine it for most users.
- 3M Windshield Repair Kit
3M’s kit is a premium pick, pricier than Permatex but built for multiple repairs. I used it on a coworker’s SUV with two chips, and the reusable syringe and extra resin were handy.
The setup is similar, with a pedestal and adhesive seal, but 3M’s resin felt thicker, reducing drips. However, the curing process was fussier, requiring a UV light for consistent results, unlike Permatex’s sunlight cure.
3M’s instructions are clear but lack photos, which tripped me up. If you’ve got multiple chips or want a reusable kit, 3M’s a contender, but for a one-off bullseye, Permatex’s simplicity and cost win out.
- J-B Weld Windshield Saver
J-B Weld’s Windshield Saver is another solid option, with a thick resin that minimizes mess. I tried it on a small star crack, and the syringe was precise, but the kit felt less complete—no alcohol towelette or pushpin like Permatex.
The curing strip was flimsier, peeling off prematurely in sunlight. J-B Weld claims to handle 1.25-inch damage like Permatex, but the instructions were text-heavy, making it less beginner-friendly.
It’s a good middle ground between Blue Star’s budget vibe and 3M’s premium feel, but Permatex’s all-inclusive kit and ease of use make it my go-to for quick fixes.
Frequently Asked Questions (FAQ)
You bet it does—for the right damage. I used it on a bullseye chip, and it shrank to a barely-there dot, holding strong months later. It’s designed for bullseyes and star cracks up to 1.25 inches, creating an airtight seal that stops spreading. User error or larger cracks can mess things up, so follow the instructions like your windshield depends on it. For minor chips, it’s a reliable fix that saves you from replacement costs.
They’re not snake oil, but they’re not magic wands either. Kits like Permatex work best on small chips and cracks—think bullseyes or stars under 1.25 inches. They fill the damage with resin, sealing it to prevent spreading and restore strength. I’ve seen great results on my car and others, but deep cracks or damage in your line of sight often need a pro. For quick, cost-effective fixes, they’re a solid bet if you do it right.
It’s a close call, but Permatex edges out for me. Both handle chips well, but Permatex’s spring-lock syringe and photo instructions made my repair smoother. Rain-X tackles longer cracks (up to 12 inches), but its applicator felt cheaper, and the guides were less clear. Permatex is better for beginners and bullseyes, while Rain-X suits slightly larger damage. Price is similar, so pick based on your chip type and DIY comfort.
In direct sunlight, the resin cures in about 15 minutes, but I gave it an hour on a partly cloudy day to be safe. Cloudy days can take at least an hour, as the resin needs UV light to harden. I parked my car in the driveway post-repair and set a timer to avoid rushing it. Patience here ensures a durable, invisible fix.
Why The Permatex Windshield Repair Kit Is a Must-Have?
After my windshield scare, I’m a Permatex convert. This kit turned a stressful chip into a quick, pro-level repair for pennies compared to a shop visit. It’s easy, effective, and packs everything you need to save your glass.
Don’t wait for a small ding to become a costly crack—grab this kit and keep it handy. You’ll thank yourself the next time a pebble tries to ruin your day. Trust me, it’s the smartest $15 you’ll spend on your car.