The Lincoln Viking 3350 is one of the most popular auto-darkening welding helmets on the market today. It offers a host of great features like advanced optics, a large viewing area, and adjustable settings that make it a versatile choice for welders.
However, like any piece of equipment, the Viking 3350 is not without its share of problems. In this comprehensive guide, we’ll take an in-depth look at the most common issues welders report with the Viking 3350 helmet, with detailed explanations for each problem and tips on how to resolve it.
Whether you already own a Lincoln Viking 3350 or are considering purchasing one, being aware of the potential problems can help you avoid headaches down the road.
We’ll also provide some handy troubleshooting advice to try if you start experiencing issues with your helmet. Read on for the complete rundown of Viking 3350 problems and fixes.
Problems with Vision Clarity and Viewing Area
One of the major selling points of the Viking 3350 is its large viewing size, offering one of the biggest lens in its price range.
However, some users report problems with blurry vision and reduced field of view after prolonged use. There are a few potential causes for these issues:
- Lens Fogging
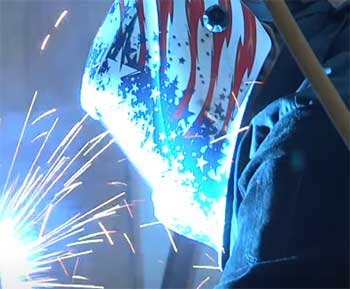
A common complaint is that the helmet lens fogs up rather easily.
Fog buildup on the inside of the lens will immediately start obstructing your view, reducing visibility of the weld puddle and joint area.
Fogging occurs when the hot air from your exhaled breath contacts the cooler surface of the lens.
To prevent fogging, make sure that your respirator or breath shield properly diverts your breath downward, away from the helmet lens.
You can also apply an anti-fog spray or wipe to the interior lens surface prior to use. Storing the helmet in a warm, dry area instead of a cold shop can also help minimize fogging.
- Lens Scratching
The auto-darkening filter lens on the Viking 3350 is susceptible to scratching if proper care isn’t taken. Even small scratches and abrasions on the lenses can cause glare and distortion. Make sure to keep the outer lens cover closed when not welding to prevent damage.
Avoid touching the interior lenses during cleaning. Over time, simply the act of loading electrodes into the gun and slipping the helmet on and off can introduce fine scratches.
Replacing the lens assembly may be necessary if scratches are causing significant viewing issues. Use a smooth, wide lens brush when cleaning rather than a cloth to avoid introducing scratches.
- Delayed Auto-Darkening
The auto-darkening filter (ADF) housed between the lens layers is what gives the Viking 3350 its convenient shade-switching functionality. However, some users notice a delayed reaction time where the helmet takes a split second to actually darken when arc welding starts. This brief delay can allow searing bright light to hit unprotected eyes.
Make sure your ADF’s response time setting is at an appropriate level for your application. Check the shade level as well—too light of a filter can require more time to darken.
Testing your reaction time with a camera flash can help you determine if speed needs adjustment. Keep the ADF lens housing clean and replace the front/rear lenses if they are heavily scratched.
- Reduced Field of View
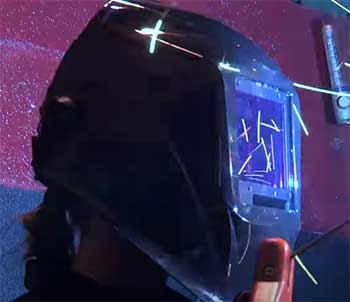
The large 12.5 square inch viewing area gives the 3350 helmet outstanding downward and peripheral vision.
However, some report that the field of view seems more restricted after months of use.
One cause may be ridge deposits building up on the interior lenses over time.
Gently clean the lenses with a brush and welding lens cleaner to remove any hazy film.
Also check that the helmet still sits squared and balanced on your head. Improper weight distribution can tilt the helmet, reducing visibility. Make sure the headgear adjusts properly and replaces worn or loose parts as needed.
- Battery and Power Issues
Like most auto-darkening helmets, the Viking 3350 runs on lithium batteries to power the ADF lens and electronic adjustments. Battery problems are among the most frequently reported issues with this helmet.
- Short Battery Life
Many users report battery life spanning just weeks or months, much shorter than the expected battery runtime. Frequent switching between light/dark modes drains the batteries faster – avoid flicking the helmet up and down needlessly.
Turning the ADF off between welds can help conserve power.
Make sure to use high quality lithium batteries and avoid no-name replacements. Installing new batteries annually can maintain optimal performance. Keep spare batteries in your welding kit for quick swaps when power starts running low.
- Battery Replacement Difficulties
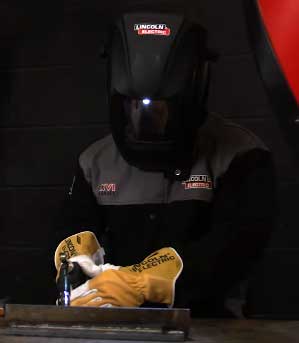
While the 3350’s batteries are easily accessible, owners report difficulties properly reinstalling batteries without electrical contacts lining up correctly.
The battery carriage must seat perfectly level and snugly in place for power transfer.
Refer to the owner’s manual diagrams to ensure batteries are oriented properly.
Check for any obstructions or damage to the carriage that could prevent proper battery contact.
Take care when reinstalling batteries to apply firm downward pressure so that the carriage clicks fully into place.
- Power Loss During Welding
Having your helmet suddenly lose power mid-weld is a dangerous scenario. This is most often caused by inadequate battery installation, where the carriage isn’t fully locked down. Loose batteries can sever the power connection when the helmet is bumped or moved.
Press down firmly on the top of the battery housing when installing new cells to ensure the carriage seats securely. Replace any malfunctioning or difficult to engage battery doors.
Never weld with the Viking 3350 unless you can confirm the batteries are correctly installed and powering up the ADF lens.
- ADF Not Reactivating After Power Loss
In some cases, the ADF auto-darkening lens fails to reactive once power has been disrupted or lost during welding. This leaves you unprotected from subsequent arc flashes.
When dealing with a non-responsive ADF, the first step is trying to reseat the batteries to reconnect power. If issues persist, contact Lincoln Electric’s customer service department for troubleshooting tips or warranty repair options.
It may be necessary to send the ADF housing off for inspection and replacement if problems can’t be resolved.
- Lens Housing and Exterior Damage
While the ruggedized plastic shell of the Viking 3350 provides ample impact protection, the lens housing and exterior are still vulnerable to certain types of damage.
Also Read: Miller Maxstar 161 Complaints And Issues.
- Melted Outer Cover Lens
The consumable outer cover lens is designed to take the brunt of spatter damage during welding. However, intense buildup of hot sparks and molten metal can melt holes right through this sacrificial lens.
Replace the cover as soon as any melting or holes appear—otherwise, splatter may start damaging the inner ADF lenses.
Keeping your head out of the direct path of the weld as much as possible helps reduce severe spatter exposure on the cover lens. A standard replacement outer cover lens for the 3350 runs about $15.
- Cracked Viewing Window
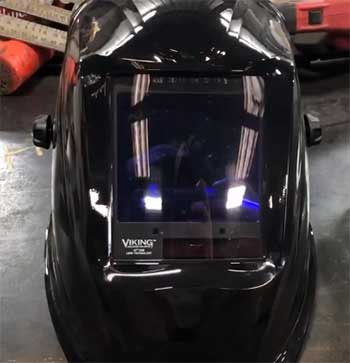
An impact to the front of the helmet can crack the viewing window of the Viking 3350.
Dropping your helmet onto concrete or hitting it against equipment can stress the plastic viewing port.
Even having a heavy welding gun swing and impact the window can introduce cracks over time.
A small crack may just obscure vision, but a major cracking can release harmful UV/IR light into your eyes.
Replace the exterior lens cover immediately at the first sign of any cracks to prevent further damage. Contact Lincoln Electric for replacement viewing window options.
- Burnt ADF Lens Housing
Prolonged exposure to welding splash and sparks can start to melt and deform the ADF lens housing on the Viking 3350. Flying bits of hot metal that make it past the cover lens stick to and burn the housing.
Significant burning or warping will compromise the light-tight seal around the lenses.
Avoid holding your head directly in the weld plume path when possible. Trim back any burnt or melted areas on the housing edges with a sharp blade. Protect your eyes from UV/IR light leakage by inspecting the housing regularly for damage.
- Broken Viewing Window Clips
The viewing window relies on plastic clips around the edge to hold it securely to the helmet. These thin clips can break if you bump or drop your helmet. Even repeated pushing upward on the window to ventilate your helmet can fatigue and snap the clips over time.
Broken clips may just cause annoyance from light leakage, but a detached window can fall out, leaving your eyes vulnerable. Replacement clip sets are available from Lincoln to secure a loose window. Adding a bead of adhesive around the window opening provides an alternate temporary fix.
- Headgear and Comfort Issues
Discomfort, looseness, or poor fit with the Viking 3350’s adjustable headgear is another commonly cited complaint:
- General Discomfort
For optimal comfort, take time to properly adjust the headgear so weight is evenly distributed on your head. The crown strap should ride midway between the top of your head and ears. Adjust the tightness so it fits snug but not painfully tight.
Gradually wear the helmet in over multiple short sessions to break-in the headgear if it feels overly stiff or rough. Replace worn or damaged sweatbands and add terrycloth helmet liners for increased comfort.
- Pressure Points and Pain
Improperly distributed weight that puts too much force on your head’s sensitive areas can cause discomfort over time. Try adjusting the angle and placement of the headgear’s ear straps and nape strap so they avoid pinching or digging into skin.
Add small foam pads or extra sweatband layers to areas where the helmet bears down excessively to disperse pressure. Take tension off painful ear and nape spots by supporting more weight on the crown and forehead straps.
- Loose, Shifting Headgear
Constant re-adjustment gets annoying when the Viking 3350’s headgear won’t stay snugly in position on your head. But loose gear also becomes a hazard if helmet stability is compromised.
Check for worn or broken tightness buckles and straps that won’t stay cinched down. Replace parts as needed to restore proper tension adjustment capability. Apply thread-locker to tighten loose swivel joint screws on the headgear. Remove excessive sweatband buildup that can interfere with proper helmet seating.
- Fogging from Exhaled Breath
Even with optimal headgear fit, the direction of your exhaled breath out the bottom of full face respirators can still penetrate up into the helmet.
Adjusting your head angle to direct breath down and away from your face may help reduce fogging. Bib-style respirator deflectors also provide an extra breath barrier.
Also Read: How Tigerhood And Pipeliner Welding Hood Stack Up?
Frequently Asked Questions (FAQ)
Lincoln Electric provides a 2 year warranty on defects in material or workmanship for the Viking 3350 helmet and components. This covers replacement of defective parts, with customer responsible for shipping costs. Normal wear items like outer cover lenses are excluded. Damage from accidents, improper use, or unauthorized repairs void the warranty.
Here are the basic steps for changing batteries in a Lincoln 3350 or other auto-darkening welding helmet:
1. Turn helmet over and locate the battery compartment on the outside of the helmet shell. It’s typically held closed by a sliding latch or screw.
2. Open the battery compartment by sliding the latch open or unscrewing the screw. The battery carriage that holds the batteries will be loose inside.
3. Carefully remove the battery carriage from the helmet. The batteries may be loose inside the carriage or soldered in place.
4. If batteries are loose, gently pry/slide them out and insert replacements of the same size and voltage per the symbols in the carriage. Make sure polarity aligns (+/-).
5. If batteries are soldered down, you’ll need to cut the battery wires and solder on new batteries. Soldering should only be done by those familiar with electronics assembly.
6. With fresh batteries installed in the carriage, realign the contacts on the carriage with the prongs in the helmet’s battery compartment. The carriage may have notches or arrows indicating proper orientation.
7. Press the battery carriage downward firmly so that it clicks fully into place and makes a secure connection. Do not force the carriage into the helmet.
8. Close the battery compartment and tighten latch or screw so that the carriage is held snugly in place without movement inside the helmet. Do not weld with a loose or improperly connected battery carriage.
Follow all battery warnings and instructions in your particular Lincoln welder user manual for full safety precautions. Replace batteries at least annually for optimal performance.
Closing Remarks
The Lincoln Viking 3350 is an innovative auto-darkening welding helmet offering outstanding optics and adjustment capabilities.
However, some common issues can arise with lens clarity, battery power, helmet shell damage, and headgear comfort. Scratched and fogged lenses, short battery life, melted cover lenses, and pressure pain points are among owners’ top reported problems.
With a bit of maintenance and troubleshooting, these issues can often be resolved to keep your Viking 3350 performing optimally. Replacing lenses, batteries, and parts immediately when problems appear helps prevent bigger headaches.
Following the tips in this guide can help identify causes and solutions for Viking 3350 issues so you can get the most out of this high-end welding helmet. With the right care and handling, the Lincoln 3350 will provide years of reliable eye safety and visibility on the job.
