You should avoid buying the Herculiner DIY bed liner kit because you deserve a professional-grade finish that doesn’t involve days of messy labor only to end up with a surface that peels and fades.
I have spent a significant amount of time analyzing the chemical composition and long-term user feedback for this polyurethane coating to see whether it truly protects a truck bed.
My intent is to provide an analytical Herculiner bed liner review so you can understand why this “budget” solution often costs more in the long run.
You will quickly realize that saving money upfront is not worth the headache of a failed application.
My personal experience with Herculiner bed liner
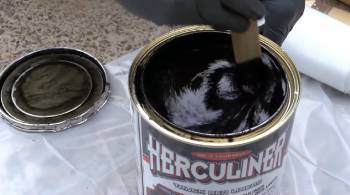
I remember the Saturday morning I decided to tackle my old pickup truck’s bed with the Herculiner kit; the smell of the solvent was the first thing that hit me, and it was absolutely overwhelming.
I am someone who prides myself on following instructions to the letter, so I spent four hours scuffing the paint with the included abrasive pad until my arms were shaking.
I started the application process with the roller provided in the kit, and I noticed that the “rubber granules” in the paint tended to clump together, making it nearly impossible to get an even texture.
I found that the first coat looked incredibly thin and patchy, which forced me to use far more material than the box suggested for a standard six-foot bed.
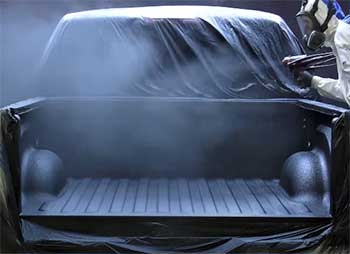
I found that the drying time was much slower than the manual claimed, likely because of the humidity in my garage.
I am a very patient person, but watching the liner stay tacky for twelve hours was frustrating, especially since I noticed dust and small insects getting trapped in the wet polyurethane.
I noticed that once the second coat finally cured, the texture was extremely aggressive; it felt like 40-grit sandpaper, which I found would actually scratch any plastic bins or wooden furniture I tried to slide into the bed.
I found that after just three months of exposure to the summer sun, the “glossy black” finish turned into a dull, chalky gray that looked twenty years old.
I think it is vital for you to know that the durability did not live up to the “tough” marketing. I noticed that when I dropped a heavy metal toolbox, the liner chipped right down to the bare metal of the truck bed, which defeated the entire purpose of “permanent” protection.
I found that cleaning the bed became a nightmare because the rough texture trapped dirt and mud that a standard garden hose couldn’t wash away.
I began to feel that the amount of prep work required was simply not worth the mediocre results.
I ended my experiment by realizing that I would have been much happier spending the extra money on a professional spray-in liner that actually comes with a lifetime warranty.
Maintenance and tips for Herculiner Bed Liner
- Scrub with a Stiff Nylon Brush During Washes: You should realize that a standard sponge will be shredded by the Herculiner texture. The deep valleys in the coating trap road salt and dirt, and this maintenance tip is the best way to prevent corrosive materials from sitting against the liner for too long, which is an analytical must for long-term bed health.
- Apply a UV-Resistant Topcoat Every Year: You should avoid letting the sun bake the bare polyurethane indefinitely. Using a specialized trim restorer or a UV-blocking spray is the best maintenance tip for preventing the “chalking” effect that turns the liner gray, ensuring your truck retains some of its resale value.
- Inspect the Bed for Gouges After Hauling Metal: You should look for any spots where the liner has been sliced down to the primer. Since Herculiner is brittle, these small nicks can allow water to crawl under the coating, so a quick “touch-up” with a small brush is the best maintenance tip for stopping a small chip from becoming a massive rust bubble.
- Use a Pressure Washer for Deep Cleaning: You should keep the nozzle at least twelve inches away from the surface. High-pressure water is the best maintenance tip for blasting out trapped mud, but getting too close can actually lift the edges of the liner if the initial adhesion wasn’t perfect, which is a common occurrence with DIY kits.
- Avoid Dragging Heavy Pallets Across the Surface: You should always lift your cargo whenever possible. The high-friction nature of Herculiner means that sliding objects will create heat and friction that can tear the rubber granules out of the resin, so using a rubber mat on top of the liner is the best maintenance tip for those who do heavy-duty hauling.
- Keep the Drain Holes Clear of Obstructions: You should ensure that the liner hasn’t plugged the factory drainage points at the front of the bed. Standing water is the enemy of any bed liner, and ensuring the bed can breathe and drain is the best maintenance tip for preventing the “swimming pool” effect that eventually causes the liner to delaminate from the metal.
Pros and Cons of Herculiner Bed Liner
Pros of Herculiner Bed Liner
- Extremely Low Upfront Cost: You can purchase a full kit for under $100: this is significantly cheaper than the $500 to $700 you would pay for a professional spray-in job: this makes it an analytical choice for owners of older “work beaters.”
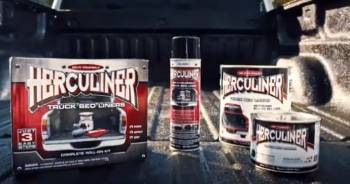
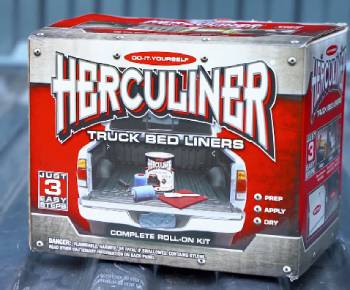
- Complete DIY Accessibility: Everything you need is included in the box: the roller, the brush, and the abrasive pad are all there: this allows you to complete the project in your own driveway without needing a compressor or spray gun.
- High-Friction Skid Resistance: The rubber granules create a very grippy surface: your cargo is much less likely to slide around during sharp turns: this provides a level of security for heavy items like engines or machinery.
- Versatile Application Potential: You can use it on more than just truck beds: I have seen people use it on rocker panels, trailers, and even boat decks: this makes it a “utility” coating for various metal and wood surfaces.
- Effective Rust Prevention (When Sealed Properly): The polyurethane creates a thick barrier against moisture: it stops oxygen from reaching the metal: this is a functional benefit for vehicles in salt-heavy regions.
- Easy to Touch Up: Since you applied it yourself: you can simply buy a small pint of the material to dab over chips or scratches: this allows for localized repairs without needing to strip the entire bed.
- Thick Coating Potential: You can apply as many layers as you want: the more you add, the more impact resistance you get: this gives the user control over the final thickness of the barrier.
Cons of Herculiner Bed Liner: An analytical look at the limitations:
- Incredibly labor-intensive preparation process: the success of the liner depends entirely on how well you sand the paint: you must remove every bit of shine or the liner will peel off in large sheets: this is an analytical nightmare for anyone without professional power tools: this results in many failed applications due to user fatigue.
- Poor UV stability and rapid fading: the black pigment is not well-protected against sunlight: after six months: the liner often turns a sickly shade of gray or white: this makes the truck look poorly maintained: this is a common theme in bad reviews from southern states.
- Aggressive texture is damaging to cargo: the “sandpaper” feel is too rough for many users: it will shred cardboard boxes and scuff the paint on expensive equipment: this limits the utility of the truck for everyday errands: this is a significant drawback for families or recreational users.
- Messy application with permanent staining: the liquid is extremely difficult to remove from skin or clothing: any drips on the truck’s exterior paint are essentially there forever: this requires an extreme level of masking and caution: this makes it a high-risk project for beginners.
- Prone to chipping under heavy impact: the material is relatively brittle once fully cured: sharp corners on metal objects can easily gouge the surface: this exposes the metal underneath to rust: this contradicts the “tough” marketing image.
- Strong chemical odors during and after application: the fumes are potent and can linger for days: you must wear a high-quality respirator or risk significant headaches: this makes the product difficult to use in attached garages: this is a major health and comfort concern.
- Difficult to clean and maintain: mud and fine dirt get trapped in the deep pits of the texture: a simple hose-down is rarely enough to get the bed clean: this requires a stiff-bristle brush and extra labor: this adds to the long-term frustration of ownership.
Herculiner Bed Liner Vs. Other Brands
Herculiner Bed Liner Vs. Rhino Liner
Rhino Liner is a professional-grade, hot-sprayed polyurethane that offers a much “rubbery” and thicker finish than Herculiner.
I have found that the Rhino Liner stays flexible over time, which means it absorbs impacts rather than chipping like the brittle Herculiner.
Analytically, the Rhino Liner is applied by a technician who handles all the grueling prep work, ensuring a bond that is far superior to anything you can do with a hand roller.
I noticed that the Rhino Liner is significantly more expensive, but it comes with a nationwide lifetime warranty.
You should choose Rhino Liner if you want real protection, as Herculiner is just a thin paint by comparison.
- Herculiner Bed Liner Vs. Line-X
Line-X is the industry standard for high-pressure, “fast-cure” bed liners that are nearly indestructible.
I have found that Line-X has a much more consistent, “orange peel” texture that looks professional and doesn’t fade as quickly as Herculiner.
Analytically, Line-X is a polyurea-based coating, making it much stronger and more resistant to chemicals than the simple polyurethane found in DIY kits.
I noticed that you can even get Line-X in custom colors to match your truck’s paint, which is a luxury Herculiner doesn’t provide.
Choose Line-X if you are a professional who needs a bed that can withstand daily abuse, while Herculiner remains a hobbyist’s compromise.
- Herculiner Bed Liner Vs. Raptor Liner
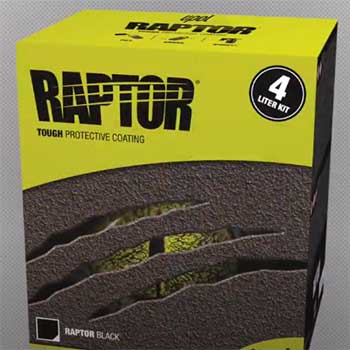
Raptor Liner is the “premium” DIY alternative that uses a spray gun (schutz gun) rather than a roller.
I have found that Raptor Liner provides a much more uniform finish and is significantly more UV-resistant than Herculiner.
Analytically, Raptor Liner is a two-part epoxy-based system, which means it cures harder and more reliably than the one-part Herculiner.
I noticed that the Raptor Liner kits are slightly more expensive but provide a result that looks much closer to a professional shop job.
You should buy Raptor Liner if you have an air compressor, as it makes Herculiner look like a messy arts-and-crafts project.
- Herculiner Bed Liner Vs. Dupli-Color Bed Armor
Dupli-Color Bed Armor is another roll-on DIY kit that uses a water-based formula containing Kevlar fibers.
I have found that Bed Armor is much easier to clean up and has less of a toxic smell than the solvent-based Herculiner.
Analytically, the Kevlar fibers provide decent scuff resistance, but the overall coating is even thinner than Herculiner, often requiring three or four coats for a decent look.
I noticed that Bed Armor stays blacker for longer, whereas Herculiner tends to turn gray within a single season.
Choose Bed Armor for a more “user-friendly” application, but realize that neither DIY option matches a professional spray.
- Herculiner Bed Liner Vs. Rough Country Bed Mat
A Rough Country Bed Mat is a thick, heavy rubber mat that simply drops into the bottom of your truck bed.
I have found that this mat provides 100% impact protection and is completely UV-stable, unlike the fading Herculiner coating.
Analytically, the mat doesn’t protect the side walls of the bed, but it is infinitely easier to install—it takes literally five seconds.
I noticed that the mat is much easier on your knees and won’t scratch your cargo, which is a major win over the sandpaper texture of Herculiner.
You should buy a bed mat if you want simple, effective protection without the multi-day mess of a roll-on liner.
Frequently Asked Questions (FAQs)
Analytically, it is only worth it if you have a very old vehicle and are on a strict budget; for newer trucks, the lack of UV stability and the risk of peeling make it a poor investment compared to professional options.
You should apply at least two thick coats, although many users find that a third coat is necessary on the floor and tailgate to prevent the “patchy” look and to provide adequate impact protection.
Herculiner is a type of bed liner, but it is a “roll-on” DIY version; it is generally considered inferior to “spray-in” liners like Line-X in terms of thickness, durability, and professional appearance.
It typically takes 24 hours to become “light use” dry, but you should wait at least 3 to 5 days before hauling heavy cargo to ensure the chemical bond has fully hardened to the metal.
Final Thoughts
You should skip the Herculiner bed liner if you value your time and want a truck bed that looks as good as it performs.
I have found that the high failure rate due to prep-work exhaustion and the inevitable fading of the finish make this a frustrating product for the average truck owner.
You deserve a liner that doesn’t chip away the first time you use your truck like a truck, and unfortunately, this DIY kit often falls short of those expectations.
I believe that investing in a professional spray-in liner or even a high-quality rubber mat is a much more analytical and rewarding choice for your vehicle’s longevity.
You are making a smarter decision for your truck’s future by looking past the low price tag and choosing a more durable protection method.